Introduction
Have you ever wondered why some home cooks create a roasted chicken that emerges from the oven golden, crispy, and impossibly juicy, while others end up with dry, disappointing results? The secret lies not in complicated techniques or exotic ingredients, but in understanding the fundamentals of properly preparing and cooking a whole bird with aromatic herbs and seasonings. This herb roasted chicken recipe transforms a simple protein into a show-stopping centerpiece that will have your family and guests asking for seconds.
Table of Contents
What makes this dish truly special is its remarkable versatility combined with its foolproof execution. Whether you’re planning a casual weeknight dinner for your family or hosting an elegant gathering, a perfectly executed herb roasted chicken delivers impressive results every single time. The beauty of this approach lies in its simplicity—you need just a handful of quality ingredients, basic kitchen equipment, and about two and a half hours from start to finish.
The magic happens when fresh herbs, aromatic vegetables, and butter work together to create layers of flavor that penetrate deep into the meat. As the chicken roasts, these elements create a natural basting system that keeps the meat incredibly moist while the skin crisps to golden perfection. This roasted chicken technique has been perfected over generations, and today I’m sharing everything you need to master it in your own kitchen.
Beyond its delicious taste, this recipe offers practical benefits for busy home cooks. One whole bird provides multiple servings, creates its own pan gravy for serving, and leaves you with bones perfect for making rich homemade stock. The leftovers are equally versatile, transforming into soups, salads, sandwiches, and grain bowls throughout the week.
Ingredients for Herb Roasted Chicken
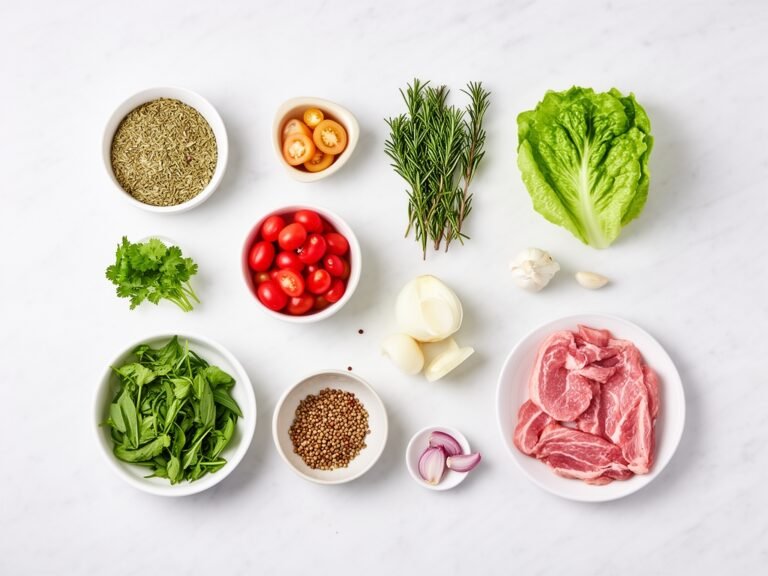
Selecting the right ingredients makes an enormous difference in your final results. The quality of your starting chicken is paramount—look for fresh, never-frozen birds when possible, as they cook more evenly and develop better texture. The herbs you choose should be fresh and fragrant, with vibrant colors and no browning or wilting. When selecting your aromatics, choose firm garlic bulbs, unblemished lemons, and colorful onions that will caramelize beautifully as they roast alongside your herb roasted chicken.
The combination of butter and olive oil creates the perfect medium for transferring heat and flavor to your bird. Room-temperature butter blends smoothly with fresh herbs and seasonings, creating a luxurious paste that slides easily under the chicken’s skin. This mixture keeps the meat moist during roasting while the olive oil helps crisp the exterior skin to golden-brown perfection. Your roasted chicken will benefit tremendously from these quality fats working together.
Understanding ingredient substitutions empowers you to work with what you have available. If fresh herbs aren’t accessible, dried herbs work acceptably, though you’ll use about one-third the amount since drying concentrates flavors. Different herb combinations create distinct flavor profiles—Italian herbs like basil and oregano offer Mediterranean flair, while traditional combinations of rosemary, thyme, and sage provide classic comfort-food appeal.
For the Chicken and Base:
– 1 whole chicken, 4 to 5 pounds, giblets removed
– Kosher salt, 1 to 2 teaspoons
– Freshly ground black pepper, ½ teaspoon
– 1 whole head garlic, halved horizontally
– 1 lemon, halved and pierced several times with a skewer
– Water for roasting pan
For the Herb Butter Mixture:
– ½ cup unsalted butter, softened to room temperature
– 2 tablespoons fresh rosemary, finely chopped
– 2 tablespoons fresh thyme, finely chopped
– 2 tablespoons fresh sage, finely chopped
– 2 tablespoons fresh parsley, finely chopped
– 3 cloves garlic, minced very fine
– ½ teaspoon kosher salt
– ¼ teaspoon black pepper
For Roasting Vegetables:
– 1 large yellow onion, sliced into thick wedges
– 3 medium carrots, cut into 2-inch chunks
– 3 celery stalks, chopped into 2-inch pieces
– 2 tablespoons olive oil
For Pan Gravy:
– 2 tablespoons all-purpose flour
– 2 cups water or chicken stock
– 4 tablespoons butter
– 2 tablespoons fresh lemon juice
– Kosher salt and black pepper to taste
Equipment Needed
Creating the perfect roasted chicken requires specific tools that make the process easier and ensure better results. A sturdy roasting pan with at least 2-inch sides prevents drippings from splattering across your oven, while allowing adequate air circulation around the bird. The roasting rack elevates your chicken above the pan bottom, allowing heat to circulate underneath for even cooking and crispy skin development.
A reliable meat thermometer removes all guesswork from determining doneness—insert it into the thickest part of the thigh without touching bone, and you’ll know exactly when your bird reaches the safe internal temperature of 165°F. This tool transforms your herb roasted chicken from potentially uncertain to perfectly cooked every single time. Additional essential tools ensure smooth preparation and execution throughout your cooking process.
Essential Kitchen Tools:
– 1 roasting pan with roasting rack
– 1 instant-read meat thermometer
– 1 pastry brush for basting
– Kitchen twine for tying legs
– 1 small mixing bowl for herb butter
– 1 sharp chef’s knife
– Cutting board
– Paper towels for patting chicken dry
– Measuring spoons and cups
– Wooden spoon for stirring gravy
– Tongs or carving fork for handling chicken
Prep Time & Cook Time
Prep Time: 30 minutes
Cook Time: 1 hour 45 minutes
Resting Time: 15 minutes
Total Time: 2 hours 30 minutes
Servings: 4 to 6 people
Difficulty Level: Easy to Intermediate
Proper timing ensures your roasted chicken finishes cooking precisely when needed. Allow 15 to 20 minutes per pound of chicken, plus an additional 15 minutes for resting. This resting period is absolutely critical—it allows juices to redistribute throughout the meat, ensuring each slice remains tender and moist rather than dry and stringy. Plan your preparation so that your herb butter mixture is ready before you begin working with the chicken, streamlining the assembly process and keeping everything organized and efficient.
Step-by-Step Instructions for Herb Roasted Chicken
Creating an exceptional roasted chicken begins long before the bird enters the oven. Proper preparation sets the foundation for success, ensuring even cooking, optimal flavor development, and that coveted crispy skin with juicy meat inside. Each step builds upon the previous one, creating a logical progression that transforms raw ingredients into a restaurant-quality dish. The following detailed instructions guide you through every stage of the process.
Step 1: Prepare Your Herb Butter Mixture
Begin by removing your butter from the refrigerator 30 minutes before you start cooking, allowing it to reach room temperature for easier mixing. In a small bowl, combine the softened butter with all four fresh herbs—rosemary, thyme, sage, and parsley—along with the minced garlic, salt, and pepper. Use a fork to blend these ingredients thoroughly until you achieve a uniform consistency with visible herb specks distributed throughout. This fragrant mixture will become your secret weapon for keeping the herb roasted chicken incredibly moist while infusing it with complex flavors. Set this mixture aside while you prepare the chicken itself.
Step 2: Remove Giblets and Pat the Chicken Dry
Remove the giblets from the chicken cavity and discard them or save them for making stock. Rinse the entire chicken under cold running water, paying special attention to the cavity. Pat the chicken completely dry inside and out using paper towels, as moisture on the skin prevents proper browning and crisping. This seemingly simple step is absolutely crucial for achieving that golden, crispy exterior that makes your roasted chicken so visually appealing and delicious. Moisture is the enemy of crispness, so take your time with this step.
Step 3: Prepare the Roasting Pan
Pour about ½ inch of water into the bottom of your roasting pan to prevent drippings from burning and to create steam that keeps the chicken moist. Arrange the sliced onions, carrot chunks, and celery pieces in the pan bottom, creating a bed of aromatic vegetables. These vegetables will caramelize during roasting, adding depth to your pan gravy while also helping to support and elevate your herb roasted chicken slightly above the pan bottom. This vegetable base creates a natural trivet while adding incredible flavor to your roasting liquid.
Step 4: Preheat Your Oven
Set your oven to 375°F and allow it to preheat fully for at least 15 minutes. A properly preheated oven ensures immediate, even heat distribution around your bird, promoting uniform cooking and proper skin development. This temperature allows the chicken to cook through completely while the skin has sufficient time to brown and crisp without burning. Taking time to ensure your oven reaches the correct temperature before beginning prevents temperature fluctuations that could compromise your roasted chicken results.
Step 5: Season the Chicken Cavity
Insert the halved lemon and halved garlic head into the chicken cavity, along with a few fresh herb sprigs if desired. These aromatic ingredients will perfume the interior of your bird as it roasts, infusing the meat with subtle flavor from within. Do not overstuff the cavity, as this can prevent proper heat circulation inside the chicken. Tie the chicken legs together loosely using kitchen twine, which helps the bird cook more evenly and retain its shape throughout the roasting process.
Step 6: Apply the Herb Butter Under the Skin
Gently slide your fingers underneath the chicken skin, starting at the neck area and working toward the thighs, being careful not to tear the delicate skin. Create small pockets between the skin and meat, then use your fingers or a small spoon to distribute about half of your herb butter mixture into these pockets. This technique ensures that the flavorful butter directly contacts the meat, seasoning it from within while also keeping it moist. Work carefully to distribute the mixture evenly across the breast and thighs for balanced flavor in your roasted chicken.
Step 7: Apply Herb Butter to the Exterior
Using a pastry brush or your fingers, apply the remaining herb butter mixture over the entire exterior of the chicken, paying special attention to the breast and thighs. Work the mixture into every crevice and fold, ensuring complete coverage. This exterior coating will brown beautifully during roasting, creating a flavorful crust while the butter bastes the skin continuously. The combination of butter under and over the skin is what transforms an ordinary herb roasted chicken into an extraordinary centerpiece.
Step 8: Position the Chicken on the Roasting Rack
Place your roasting rack into the prepared roasting pan, positioning it over the vegetables and roasting liquid. Carefully place the herb-coated chicken on the rack, breast-side up. This positioning allows air to circulate completely around the bird, promoting even cooking and optimal skin crisping. The elevated position keeps the chicken away from the roasting liquid, preventing the bottom from steaming rather than roasting. Ensure the chicken is stable and centered on the rack before proceeding.
Step 9: Insert the Meat Thermometer
Insert your instant-read meat thermometer into the thickest part of the thigh, positioning it so the tip reaches the innermost meat without touching bone. This placement provides the most accurate reading of the chicken’s doneness, as the thigh is the last part to cook through. Make a mental note of the thermometer’s position so you can easily check it during roasting without removing the chicken from the oven. This tool will tell you precisely when your roasted chicken reaches the safe internal temperature of 165°F.
Step 10: Begin Roasting
Place the prepared chicken in your preheated 375°F oven. Set a timer for approximately 1 hour and 15 minutes, though the exact time depends on your specific bird’s size and your oven’s characteristics. Resist the urge to open the oven door frequently, as this releases heat and extends cooking time. Every time you open the door, you interrupt the cooking process and allow temperature to drop. Your roasted chicken needs consistent, uninterrupted heat to cook evenly and develop proper skin color.
Step 11: Baste the Chicken
After 45 minutes of roasting, carefully remove the pan from the oven and use a pastry brush to baste the chicken with the pan juices. Tilt the pan slightly and brush the accumulated juices over the breast, thighs, and legs. This basting step keeps the skin moist and promotes even browning while adding additional flavor. Return the chicken to the oven and continue roasting. Repeat this basting process every 20 to 25 minutes for the remainder of the cooking time, always being careful when handling the hot pan.
Step 12: Check for Doneness
Beginning around the 1-hour and 15-minute mark, check your meat thermometer reading. When the thickest part of the thigh reaches 165°F, your chicken is fully cooked and ready to come out of the oven. If the skin hasn’t achieved your desired golden-brown color, you can increase the oven temperature to 425°F for the final 10 to 15 minutes of cooking. This technique, called finishing hot, crisps the skin beautifully without overcooking the meat. Your herb roasted chicken is now ready for its crucial resting period.
Step 13: Rest the Chicken
Remove the chicken from the oven and carefully transfer it to a clean cutting board or serving platter. Tent it loosely with aluminum foil and allow it to rest for 15 minutes before carving. During this resting period, the residual heat continues cooking the interior slightly while the juices redistribute throughout the meat. This step is absolutely critical for achieving moist, tender results—skipping it results in dry meat because the juices haven’t had time to reabsorb. Resting transforms your roasted chicken from good to truly exceptional.
Step 14: Make Pan Gravy
While the chicken rests, prepare a flavorful gravy using the pan drippings. Place the roasting pan on the stovetop over medium heat. Sprinkle the flour over the pan drippings and stir constantly for 2 to 3 minutes, allowing the flour to cook and absorb the fat, creating a roux. Gradually whisk in the water or chicken stock, stirring constantly to prevent lumps from forming. Add the butter and lemon juice, then season with salt and pepper to taste. Simmer for 3 to 5 minutes until the gravy reaches your desired consistency. This rich, flavorful gravy perfectly complements your roasted chicken.
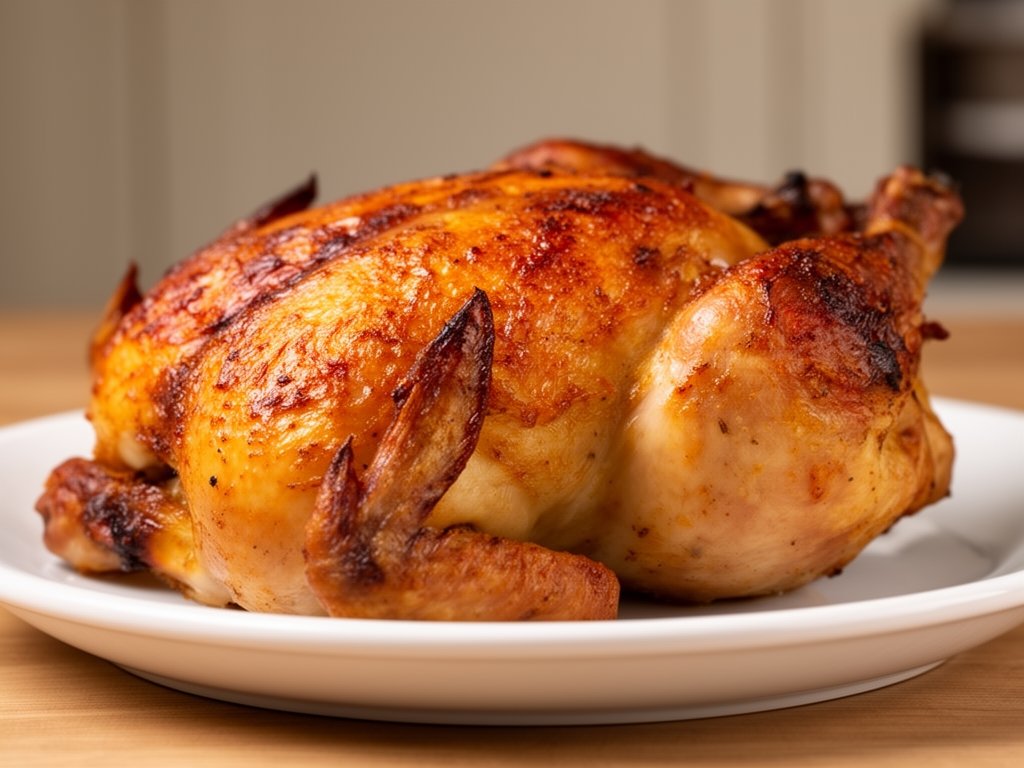
Step 15: Carve and Serve
Once the chicken has rested adequately, transfer it to your serving platter or carving board. Using a sharp knife and carving fork, carefully separate the legs and thighs from the body, then separate the breasts. Arrange the carved pieces on a serving platter, pour your pan gravy over or alongside the meat, and serve immediately. The combination of tender, juicy meat, crispy skin, and rich gravy creates a complete, satisfying meal. Your perfectly executed roasted chicken is now ready to impress your family and guests.
Nutritional Information
A properly prepared roasted chicken provides excellent nutritional value, delivering high-quality protein, essential vitamins, and beneficial minerals in every serving. Chicken is renowned as one of the leanest protein sources available, particularly when you remove the skin, though keeping the skin intact provides additional flavor and helps retain moisture during cooking. The herbs used in this recipe contribute more than just flavor—they provide antioxidants, anti-inflammatory compounds, and various phytonutrients that support overall health and wellness.
The combination of fresh herbs like rosemary, thyme, sage, and parsley offers surprising nutritional benefits beyond their culinary appeal. These herbs contain compounds that support digestion, boost immune function, and provide antioxidant protection. Garlic and lemon add their own health-promoting properties, including allicin in garlic which supports cardiovascular health, and vitamin C from lemon which aids immune function. When you combine these elements with quality chicken, you create a dish that nourishes your body while satisfying your palate.
The butter and olive oil used in this herb roasted chicken recipe provide healthy fats that support nutrient absorption and satiety. While these are calorie-dense ingredients, they’re used in moderate amounts and contribute essential fatty acids and fat-soluble vitamins. The vegetables in the roasting pan—onions, carrots, and celery—add fiber, vitamins, and minerals while contributing minimal calories. Together, these components create a nutritionally balanced meal that satisfies both hunger and nutritional needs.
Estimated Nutritional Values Per Serving (based on 4 servings, with skin):
– Calories: 620 to 680
– Protein: 68 to 72 grams
– Total Fat: 35 to 38 grams
– Saturated Fat: 12 to 14 grams
– Carbohydrates: 3 to 5 grams
– Fiber: 0 to 1 gram
– Sodium: 420 to 480 milligrams
– Potassium: 380 to 420 milligrams
– Iron: 1.8 to 2.2 milligrams
– Zinc: 3.2 to 3.8 milligrams
Serving Suggestions & Variations
Your roasted chicken serves as a versatile centerpiece that pairs beautifully with countless side dishes and accompaniments. Roasted root vegetables like potatoes, sweet potatoes, parsnips, and beets complement the herb flavors perfectly, especially when roasted in the same oven alongside your chicken. Creamy mashed potatoes or buttery egg noodles provide comforting starches that soak up the delicious pan gravy. Fresh green vegetables like roasted asparagus, steamed broccoli, or sautéed green beans add nutritional balance and color contrast to your plate.
For lighter accompaniments, consider serving your herb roasted chicken alongside fresh salads featuring mixed greens, seasonal vegetables, and vinaigrette dressings. A simple arugula salad with lemon vinaigrette echoes the citrus notes in your chicken, while a hearty grain salad with farro or quinoa creates a complete, satisfying meal. Roasted vegetable medleys featuring zucchini, bell peppers, and tomatoes offer Mediterranean-inspired options that highlight the herbs in your dish.
Seasonal variations allow you to adapt this recipe throughout the year. In spring, incorporate fresh tarragon and chervil into your herb butter for delicate, elegant flavor. Summer variations might feature basil and oregano for Italian-inspired flair, while autumn preparations could emphasize sage and thyme for deeper, earthier tones. Winter versions work beautifully with traditional rosemary and thyme, creating warming comfort-food appeal. Each seasonal variation transforms your roasted chicken while maintaining its fundamental appeal.
Alternative cooking methods expand your options when oven space is limited. Spatchcock your chicken by removing the backbone and flattening it before roasting, which reduces cooking time to approximately 1 hour and creates exceptionally crispy skin. Grilling your herb-butter-prepared chicken over medium heat produces smoky flavor and beautiful grill marks, though this requires careful temperature management to prevent burning. Rotisserie cooking creates restaurant-quality results with minimal hands-on effort, though you’ll need access to a rotisserie oven.
Ingredient substitutions accommodate different preferences and dietary needs. Replace some or all of the butter with additional olive oil for a lighter preparation, though you’ll lose some richness. Experiment with different fresh herb combinations based on your preferences—Italian herbs, French herbes de Provence, or Mexican cilantro and epazote all create distinct flavor profiles. Substitute the lemon with lime for brighter, more tropical notes, or use orange for warmer, sweeter undertones. These variations keep your herb roasted chicken fresh and exciting across multiple preparations.
Expert Tips & Tricks for Perfect Roasted Chicken
Mastering the art of roasting chicken requires understanding not just the steps, but the reasoning behind each technique. Professional cooks have developed numerous strategies that transform good results into exceptional ones. These expert insights, accumulated through years of kitchen experience, help you achieve consistent, impressive results every single time you prepare this classic dish. Implementing even a few of these techniques will noticeably improve your outcomes.
Tip 1: Choose the Right Size Bird
Select chickens weighing between 4 and 5 pounds for optimal results, as these sizes cook evenly throughout without requiring extended time that dries out the breast meat. Smaller chickens cook too quickly, while larger birds require extended roasting that can compromise texture. A 4 to 5-pound bird provides 4 to 6 generous servings and cooks in approximately 1 hour and 45 minutes at 375°F. This size represents the sweet spot for home cooks seeking perfectly cooked roasted chicken every single time.
Tip 2: Bring Chicken to Room Temperature
Remove your chicken from the refrigerator 30 to 45 minutes before roasting, allowing it to reach room temperature. This ensures more even cooking throughout the bird, preventing the exterior from overcooking while the interior remains undercooked. Room-temperature chicken also requires slightly less total cooking time and develops more even browning. This simple step significantly improves your herb roasted chicken results without requiring any additional effort or skill.
Tip 3: Use Fresh Herbs Whenever Possible
Fresh herbs provide superior flavor compared to dried alternatives, though dried herbs work acceptably when fresh aren’t available. If using dried herbs, reduce quantities by two-thirds since drying concentrates flavors significantly. Fresh herbs maintain their delicate aromatic compounds better than dried versions, creating more nuanced, complex flavors in your roasted chicken. Growing a small herb garden or purchasing fresh herbs from your local market ensures you always have options available.
Tip 4: Don’t Skip the Resting Period
The 15-minute resting period after roasting is absolutely non-negotiable for achieving moist, tender results. During this time, the residual heat continues cooking the interior slightly while the muscle fibers relax and reabsorb the cooking juices. Carving immediately after removing the chicken from the oven causes juices to run onto the plate rather than remaining in the meat. This single step transforms your herb roasted chicken from merely acceptable to truly exceptional in terms of texture and juiciness.
Tip 5: Invest in a Quality Meat Thermometer
An instant-read meat thermometer removes all guesswork from determining doneness, ensuring perfectly cooked results consistently. Insert the thermometer into the thickest part of the thigh without touching bone, and cook until the internal temperature reaches 165°F. This tool prevents both undercooked chicken that poses food safety risks and overcooked chicken that becomes dry and stringy. A quality thermometer is one of the most valuable investments any home cook can make for improving roasted chicken outcomes.
Tip 6: Create a Vegetable Base for Pan Gravy
Arranging onions, carrots, and celery in the roasting pan bottom serves multiple purposes—they support the chicken, create steam for moisture, and provide flavorful base for pan gravy. These vegetables caramelize during roasting, adding depth and complexity to your gravy. The aromatic compounds from these vegetables infuse the roasting liquid, creating a foundation for rich, flavorful sauce that perfectly complements your herb roasted chicken.
Tip 7: Baste Regularly for Maximum Flavor and Moisture
Basting the chicken with pan juices every 20 to 25 minutes promotes even browning, keeps the skin moist, and infuses the meat with additional flavor. This technique, while requiring a few extra minutes of attention, noticeably improves results. The basting liquid carries fat-soluble flavor compounds to all areas of the bird, creating more complex, developed taste. Your roasted chicken will demonstrate noticeably superior results when you commit to regular basting throughout the roasting process.
Tip 8: Pat the Skin Completely Dry Before Roasting
Moisture on the skin prevents proper browning and crisping, so take time to thoroughly dry the chicken inside and out using paper towels. Even small amounts of residual moisture can compromise your final results. Dry skin allows the butter and seasonings to adhere properly while promoting the browning reactions that create that coveted golden exterior. This simple step takes just a few minutes but significantly improves the appearance and texture of your herb roasted chicken.
Tip 9: Use Room-Temperature Butter for Easy Mixing
Softened butter at room temperature blends smoothly with herbs and seasonings, creating a uniform mixture that spreads easily under and over the chicken skin. Cold butter is difficult to work with and doesn’t incorporate herbs evenly, while melted butter runs off the chicken rather than coating it properly. Remove butter from the refrigerator 30 minutes before you need it, and your herb butter preparation becomes effortless. This attention to detail ensures your roasted chicken receives an even coating of flavorful butter.
Tip 10: Don’t Overcrowd the Oven
Ensure adequate space around your roasting pan for proper air circulation, which promotes even cooking and optimal browning. Overcrowding the oven creates hot spots and uneven temperatures that compromise results. If roasting multiple chickens, position them on separate racks with adequate spacing between them. This attention to oven space management ensures your roasted chicken cooks evenly and develops proper skin color throughout.
Common Mistakes to Avoid
Understanding the most frequent errors that compromise herb roasted chicken results helps you avoid these pitfalls in your own kitchen. Even experienced cooks occasionally fall into these traps, so awareness and prevention are crucial for consistent success. Learning from others’ mistakes accelerates your own skill development and ensures better results from your first attempt onward.
Mistake 1: Skipping the Resting Period
Many home cooks remove the chicken from the oven and immediately begin carving, eager to serve their creation. This mistake causes juices to escape onto the plate rather than remaining in the meat, resulting in dry, disappointing texture. The 15-minute resting period is absolutely essential for allowing juices to redistribute and muscles to relax. Skipping this step undermines all the careful preparation and cooking that preceded it, transforming your roasted chicken from potentially excellent to merely acceptable.
Mistake 2: Using Cold or Partially Thawed Chicken
Starting with a cold or partially thawed chicken results in uneven cooking, with the exterior overcooked while the interior remains undercooked. The exterior reaches target temperature and begins browning long before the cold interior cooks through, creating texture and safety problems. Always allow chicken to reach room temperature before roasting, or use the low-and-slow method for partially thawed birds. This single mistake more than any other compromises your herb roasted chicken results.
Mistake 3: Insufficient Seasoning
Underseasoning is one of the most common mistakes that results in bland, disappointing roasted chicken. Remember that seasoning must penetrate the meat, not just coat the surface. Use adequate salt and pepper both inside and outside the bird, and don’t shy away from the herb butter mixture. The combination of herbs, garlic, and seasonings should be assertive enough to flavor the entire bird throughout. Taste your herb butter mixture before applying it to the chicken, and adjust seasonings as needed.
Mistake 4: Overcooking the Chicken
Cooking beyond 165°F internal temperature results in dry, stringy meat that disappoints despite all your careful preparation. Use a meat thermometer to monitor doneness precisely, removing the chicken the moment it reaches safe temperature. Remember that carryover cooking continues after removal from the oven, so removing at exactly 165°F ensures perfect doneness after resting. Overcooked herb roasted chicken represents wasted effort and ingredients, so precision is essential.
Mistake 5: Not Patting the Chicken Dry
Moisture on the skin prevents proper browning and crisping, resulting in pale, flabby skin instead of the desired golden, crispy exterior. Take time to thoroughly dry the chicken inside and out with paper towels, and you’ll notice dramatic improvements in your results. This simple step takes just a few minutes but significantly impacts the final appearance and texture of your roasted chicken.
Mistake 6: Failing to Use a Meat Thermometer
Relying on visual cues, cooking time, or the “juices running clear” test leads to inconsistent results and potential food safety issues. A meat thermometer provides objective, accurate information about doneness, removing all guesswork. This inexpensive tool is one of the most valuable investments for improving your herb roasted chicken outcomes and ensuring food safety simultaneously.
Mistake 7: Opening the Oven Door Too Frequently
Each time you open the oven door, you release heat and interrupt the cooking process, extending total cooking time and compromising results. Resist the urge to check on your chicken constantly—open the door only when necessary for basting. Your roasted chicken needs consistent, uninterrupted heat to cook evenly and develop proper skin color.
Storage & Reheating Instructions
Properly storing leftover herb roasted chicken extends its usefulness and prevents food waste. Allow the cooked chicken to cool to room temperature before refrigerating, which typically takes 30 to 45 minutes. Remove the meat from the bones and store in airtight containers, separating the meat from skin and bones for easier use in various applications. Properly stored cooked chicken remains safe and maintains good quality for three to four days in the refrigerator.
For longer-term storage, freeze your roasted chicken for up to three months. Remove meat from bones and pack it into freezer-safe containers or bags, pressing out excess air to prevent freezer burn. Label containers with the date and contents for easy identification later. Frozen chicken meat thaws safely in the refrigerator overnight or quickly in cold water, making it convenient for future meals. The bones make excellent stock—freeze them separately for making rich, flavorful homemade broth.
Reheating methods significantly impact the quality of your leftover herb roasted chicken. For best results, reheat gently in a 325°F oven covered with foil for 15 to 20 minutes, adding a splash of water or broth to prevent drying. Alternatively, shred the meat and warm it gently in a skillet over medium-low heat with a bit of broth or butter, stirring occasionally. Microwave reheating works for quick meals but tends to dry out the meat more than other methods. Never reheat chicken at high temperatures, as this accelerates moisture loss and compromises texture.
Leftover roasted chicken transforms into countless delicious applications throughout the week. Shred the meat for chicken salad, grain bowls, tacos, or sandwiches. Add chunks to soups, stews, and casseroles for quick, protein-rich meals. The bones create rich, flavorful stock perfect for soups and risottos. Even the skin adds flavor to broth. This versatility means nothing goes to waste, and you maximize value from your cooking effort.
Conclusion
Creating a perfect roasted chicken represents one of the most valuable skills any home cook can develop. This classic dish combines simplicity with impressive results, delivering restaurant-quality meals from your own kitchen. The techniques and insights shared throughout this guide transform the basic process into a refined art form, ensuring consistent excellence every single time you prepare this dish. Whether you’re cooking for family, friends, or special occasions, a perfectly executed herb roasted chicken never fails to impress.
The beauty of this recipe lies in its versatility and reliability. From the aromatic herb butter that infuses the meat with complex flavors to the pan gravy that captures every delicious dripping, every element works together to create something truly special. Your investment of time and attention yields results that far exceed the effort required, making this dish perfect for both weeknight dinners and elegant entertaining. Once you’ve mastered this fundamental technique, you’ll find yourself returning to it again and again.
I encourage you to try this roasted chicken recipe soon, implementing the techniques and tips shared here. Notice how the fresh herbs perfume your kitchen as the chicken roasts, how the skin crisps to golden perfection, and how the meat remains incredibly moist and tender. Share your success with family and friends, and discover the joy of creating something truly delicious from simple, quality ingredients. Your next dinner table will be filled with satisfied smiles and empty plates.
Frequently Asked Questions
Q: Can I prepare the herb butter mixture in advance?
Yes, absolutely. Prepare your herb butter mixture up to 24 hours ahead and store it in the refrigerator in an airtight container. Remove it 15 minutes before you’re ready to apply it to the chicken, allowing it to soften slightly for easier spreading. This advance preparation streamlines your cooking day, allowing you to focus on other preparations when it’s time to roast your herb roasted chicken.
Q: What if my chicken skin isn’t as crispy as I’d like?
If your skin hasn’t achieved desired crispness by the end of cooking, increase the oven temperature to 425°F for the final 10 to 15 minutes. This finishing-hot technique crisps the skin beautifully without overcooking the meat. Alternatively, you can broil the chicken briefly at the end of cooking, watching carefully to prevent burning. Ensuring the skin is completely dry before roasting also significantly improves crisping results.
Q: Can I use dried herbs instead of fresh?
Yes, dried herbs work acceptably when fresh aren’t available. Use approximately one-third the amount of dried herbs compared to fresh, since drying concentrates flavors significantly. Dried herbs provide less aromatic complexity than fresh, but they still deliver good flavor. For the best results, use fresh herbs whenever possible, but don’t hesitate to use dried herbs rather than omitting them from your roasted chicken preparation.
Q: How long does cooked chicken keep in the refrigerator?
Properly stored cooked chicken remains safe and maintains good quality for three to four days in the refrigerator. Store the meat in airtight containers separate from bones and skin for easier use in various applications. Always refrigerate leftovers within two hours of cooking, and use proper food handling techniques to prevent bacterial growth.
Q: Can I freeze my roasted chicken?
Yes, frozen herb roasted chicken keeps safely for up to three months. Remove meat from bones and pack into freezer-safe containers or bags, pressing out excess air. Label with the date and contents for easy identification. Thaw overnight in the refrigerator or quickly in cold water before reheating. The bones also freeze well for making stock.
Q: What’s the best way to reheat leftover roasted chicken?
Gentle reheating in a 325°F oven covered with foil for 15 to 20 minutes preserves moisture and texture best. Add a splash of water or broth to prevent drying. Alternatively, shred the meat and warm it gently in a skillet over medium-low heat with broth or butter. Avoid high-temperature reheating methods that dry out the meat, and never use the microwave for best results.
Q: Can I cook a larger chicken using this method?
Yes, but cooking time increases with size. Plan for approximately 15 to 20 minutes per pound of chicken, plus an additional 15 minutes. A 6-pound chicken requires approximately 2 hours and 15 minutes to 2 hours and 30 minutes at 375°F. Always use a meat thermometer to determine doneness rather than relying solely on cooking time, as individual ovens vary. Your roasted chicken is done when the thickest part of the thigh reaches 165°F.
Q: What can I do with the leftover bones?
Save your bones to make rich, flavorful homemade stock. Place bones in a large pot with water, onions, carrots, and celery, then simmer for 2 to 4 hours. Strain and cool before refrigerating or freezing. This stock becomes the foundation for soups, risottos, and sauces, maximizing the value from your roasted chicken.
Q: Can I substitute the herbs with different varieties?
Absolutely. Experiment with Italian herbs like basil and oregano, French herbes de Provence, or other combinations based on your preferences. Different herb combinations create distinct flavor profiles while maintaining the fundamental technique. Your herb roasted chicken adapts beautifully to various herb selections, allowing you to create seasonal variations or accommodate different taste preferences.
Q: How do I know when my chicken is done without a thermometer?
While a meat thermometer provides the most accurate method, you can check doneness by piercing the thickest part of the thigh with a knife—juices should run clear rather than pink. However, this method is less reliable than a thermometer. The thigh meat should be tender and easily separate from the bone. For food safety, a meat thermometer reading of 165°F in the thickest part of the thigh is the most reliable indicator that your roasted chicken is safely cooked throughout.